 Preservatives(food)
 Flavor Enhancers
 Acidulants
 Sweeteners
 Antioxidants
 Colorants(food)
 Nutraceutical Ingredients (food)
 Nutrient Supplements
 Emulsifiers
 Collectors
 Dust Suppressants
 Explosives and Blasting Agents
 Flocculants and Coagulants
 Frothers
 Leaching Agents
 pH Modifiers
 Precious Metal Extraction Agents
 Antioxidants(plastic)
 Colorants (Pigments, Dyes)
 Fillers and Reinforcements
 Flame Retardants
 Monomers
 Plasticizers
 Polymerization Initiators
 Stabilizers (UV, Heat)
 Antifoaming Agents
 Chelating Agents
 Coagulants and Flocculants
 Corrosion Inhibitors
 Disinfectants and Biocides
 Oxidizing Agents
 pH Adjusters
 Scale Inhibitors( water)
 Antioxidants(cosmetic)
 Emollients
 Fragrances and Essential Oils
 Humectants
 Preservatives
 Surfactants(cosmetic)
 Thickeners
 UV Filters
 Fertilizers
 Soil Conditioners
 Plant Growth Regulators
 Animal Feed Additives
 Biostimulants
 Pesticides (Herbicides, Insecticides, Fungicides)
 Active Pharmaceutical Ingredients (APIs)
 Excipients
 Solvents(pharmaceutical)
 Antibiotics
 Antiseptics and Disinfectants
 Vaccine Adjuvants
 Nutraceutical Ingredients (pharmaceutical)
 Analgesics & Antipyretics
 Analytical Reagents
 Solvents(lab)
 Chromatography Chemicals
 Spectroscopy Reagents
 microbiology-and-cell-culture-reagents
 Molecular Biology Reagents
 Biochemical Reagents
 Inorganic and Organic Standards
 Laboratory Safety Chemicals
 Specialty Laboratory Chemicals(Special Laboratory Equipment)
 Demulsifiers
 Hydraulic Fracturing Fluids
 Scale Inhibitors(oil)
 Surfactants(oil)
 Drilling Fluids
 Dyes and Pigments
 Bleaching Agents
 Softening Agents
 Finishing Agents
 Antistatic Agents
 Admixtures
 Waterproofing Agents
 Sealants and Adhesives
 Curing Compounds
 Concrete Repair Chemicals
 Anti-Corrosion Coatings
 Surfactants(cleaning)
 Builders
 Enzymes
 Solvents (Cleaning)
 Fragrances
 Electronic Chemicals
 Catalysts
 Lubricants
 Photographic Chemicals
 Refrigerants
 Automotive chemicals
 Pyrotechnic Chemicals
 Biodegradable Surfactants
 Bio-based Solvents
 Renewable Polymers
 Carbon Capture Chemicals
 Wastewater Treatment Chemicals
 Pigments
 Solvents(paint)
 Specialty Coatings
 Binders/Resins
 Additives
 Driers
 Anti-Corrosion Agents
 Functional Coatings
 Application-Specific Coatings
 Leavening Agents
 Dough Conditioners
 Flour Treatments
 Fat Replacers
 Decoratives
 Preservatives(baking)
 Plasticizers & Softeners
 Reinforcing Agents
 Adhesion Promoters
 Vulcanizing Agents
 Antidegradants
 Blowing Agents
 Fillers & Extenders
 Accelerators & Retarders


Complete optical bench
Product Description
Complete Optical Bench is a precision laboratory apparatus designed to facilitate experiments involving optics, such as the study of lenses, mirrors, light refraction, reflection, and focal lengths. It consists of a rigid, graduated base rail with movable holders for optical components like lenses, mirrors, prisms, and light sources. The modular design allows flexible setup of various optical experiments, making it an essential tool in physics laboratories for teaching and research.
Complete optical bench
Primary Uses
- Laboratory Applications
- Conducting experiments on lens focal length, magnification, and image formation.
- Studying reflection, refraction, and dispersion of light.
- Measuring optical parameters of lenses and mirrors.
- Demonstrating fundamental optics principles in physics education.
Secondary Uses
- Industrial Applications
- Calibration and testing of optical instruments and components.
Research and development of optical devices and sensors.
1.Basic Identification Attributes
- Product Type: Optical Bench System
- Components: Base rail, lens holders, mirror holders, light source holders, scale for measurements
- Material: Anodized aluminum or durable metal for stability and precision
2.Physical & Chemical Properties
- Length: Typically ranges from 60 cm to 100 cm
- Graduated Scale: Millimeter markings for precise positioning
- Surface: Non-reflective finish to minimize stray light interference
3.Safety & Hazard Attributes
- Mechanical Risks: Moving parts can pinch fingers; handle with care
- Optical Risks: Avoid direct eye exposure to intense light sources
4.Storage & Handling Attributes
- Storage Conditions: Keep in a dry, dust-free environment
- Handling Precautions: Transport carefully to prevent misalignment or damage
5.Regulatory & Compliance Attributes
- Manufactured to meet laboratory equipment standards
- Ensures accuracy and durability for repeated experimental use
6.Environmental & Health Impact
- Made from recyclable metal components
- No hazardous materials involved
Safety Handling Precautions
- Use eye protection when working with intense light sources
- Secure all components firmly on the bench before starting experiments
First Aid Measures
- In case of eye discomfort from light exposure, move away and rest eyes
- For mechanical injuries, clean and dress wounds appropriately
Firefighting Measures
- Fire Hazard: Non-flammable apparatus; exercise caution with electrical light sources
- Extinguishing Media: Use appropriate extinguisher for electrical fires if necessary
Related products
Absorption Tower
An Absorption Tower is a vertical vessel used in industrial processes to remove specific components from gas streams by contact with a liquid solvent. This equipment facilitates mass transfer between the gas and liquid phases, allowing targeted pollutants or valuable compounds to be absorbed efficiently. Absorption Towers are commonly employed in chemical plants, refineries, and environmental control systems for gas scrubbing, purification, and recovery applications. They are designed for optimal gas-liquid contact, often using packing materials or trays to enhance surface area and improve absorption efficiency.

Atomic Model Set
The Atomic Model Set is an educational tool designed to visually demonstrate the structure of atoms and molecules. It consists of color-coded balls representing protons, neutrons, and electrons, connected by rods to simulate atomic bonds. This set is widely used in classrooms, laboratories, and training centers to aid in the teaching of atomic theory, molecular geometry, chemical bonding, and related concepts. Made from durable plastic materials, the set provides a hands-on, interactive experience that enhances understanding of complex scientific principles.
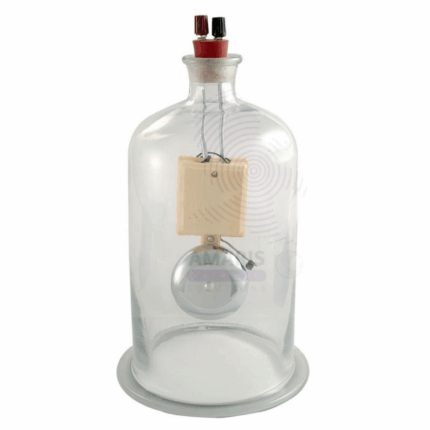
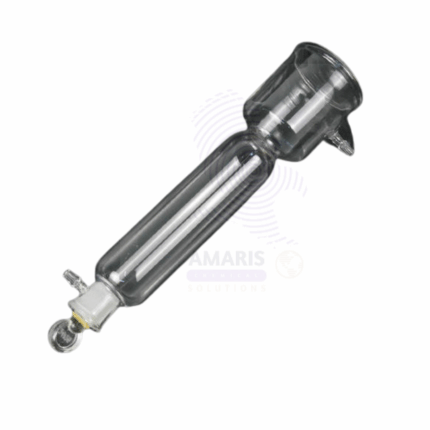
Bell in Vacuum
Bell in Vacuum is a crucial component used in vacuum systems to create an airtight seal and protect sensitive equipment from atmospheric contamination. Typically made of durable, corrosion-resistant materials, it forms part of vacuum chambers or devices requiring controlled environments. The bell ensures the maintenance of vacuum integrity by preventing air ingress, making it essential for experiments and industrial processes that depend on low-pressure or vacuum conditions.
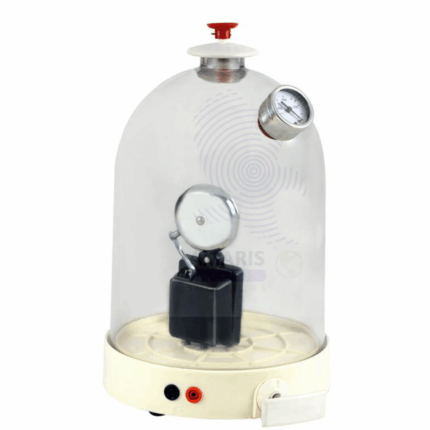
Bell in Vacuum with Air Pump with Plate
Bell in Vacuum with Air Pump with Plate is an integrated vacuum apparatus used to create and maintain low-pressure environments for laboratory and industrial applications. This assembly includes a vacuum bell, an air pump to evacuate air from the chamber, and a sturdy plate to support or seal samples or components during vacuum processes. Designed for durability and reliability, it is widely used in experiments requiring controlled atmospheric pressure, including vacuum filtration, drying, and physical science demonstrations.
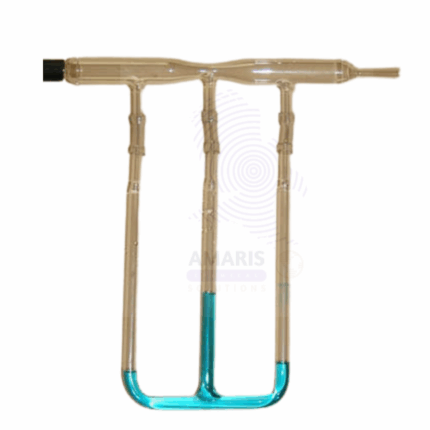
Bernoulli Tube Apparatus
Bernoulli Tube Apparatus is a precision-engineered device designed to demonstrate and analyze the principles of fluid dynamics, specifically Bernoulli’s theorem. It consists of a transparent, variable-diameter horizontal tube equipped with multiple pressure tap points connected to manometer tubes. This allows for the visual observation and quantitative measurement of pressure, velocity, and flow relationships as fluid moves through different cross-sectional areas. Commonly used in laboratory and industrial fluid mechanics testing, it helps validate theoretical predictions in controlled experimental conditions.
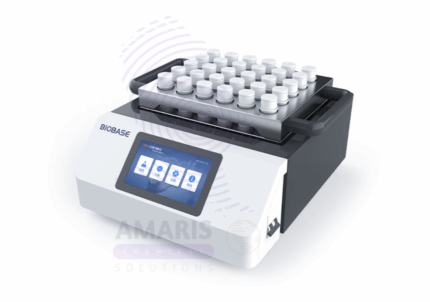
Bio-Waste Digester Kit
The Bio-Waste Digester Kit (1 Liter) is a compact, ready-to-use microbial solution designed to accelerate the decomposition of organic waste through natural biodegradation. This kit contains a high-activity blend of non-pathogenic microorganisms and enzymes capable of breaking down a wide range of biodegradable materials including food scraps, plant matter, and organic sludge. It is formulated for efficient use in laboratory-scale digestion experiments as well as small-scale industrial or institutional bio-waste treatment systems. The product supports environmentally responsible waste management by reducing organic load, minimizing odors, and converting waste into more manageable byproducts such as methane, carbon dioxide, and stabilized compost.

Chromatogram Paper
Chromatogram Paper is a specialized high-quality absorbent paper used primarily in chromatography techniques for the separation and analysis of chemical substances. Manufactured to have consistent texture and porosity, it facilitates effective migration of solvents and analytes, allowing clear and reproducible chromatographic patterns. Widely utilized in laboratories for qualitative and quantitative chemical analysis, Chromatogram Paper is essential for research, quality control, and educational purposes.
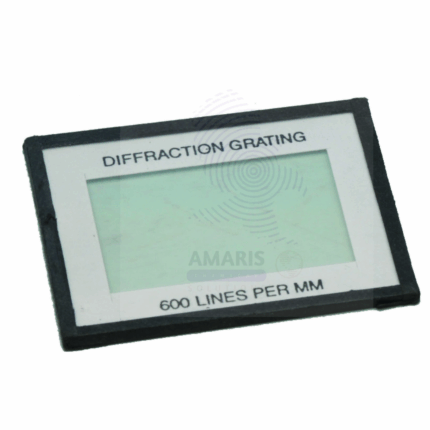
Diffraction Gratings
Diffraction Gratings are precision optical components used to disperse light into its component wavelengths for spectral analysis. These gratings consist of a surface with a series of closely spaced lines or grooves that diffract incoming light at specific angles depending on wavelength, enabling separation and measurement of spectral bands. Available in transmission or reflection formats, diffraction gratings are made from materials like glass or quartz and are often coated for enhanced optical performance. They are widely used in laboratories, research institutions, and industrial applications involving spectroscopy, photonics, and laser systems.